


Microsoft Windows XP is an old operating system that has reached the end of its support from Microsoft. But if you’re still required to run it, then the best way to do so is to execute it on a virtual machine.
I completely switched to ‘Linux‘ about a year ago and personally, and starting very recently, I wanted to run Windows XP because I have to use a couple of applications that’re only designed to run in Windows, and for a couple of months I’ve been using my licensed Windows 8.1 in a virtual machine on Ubuntu 15.10 just for the sake of running those applications. But my laptop only has 4 GB of RAM and when using Windows 8.1 virtual machine (I use VirtualBox and have allocated 1.4 GB of RAM for Windows 8.1) alongside my web browser with 8-12 tabs opened in Ubuntu 15.10, it really slows things down due to the heavy memory usage.
So recently I switched to a Windows XP virtual machine to see if I can counteract this somehow. I’ve been using it for a few weeks now, and with just a 700 MB RAM, XP runs great!. Sure it’s an outdated and a bit ugly looking operating system, but I just use it for the sake of running my applications. I can’t really complain. However, being old, Windows XP also has an outdated hardware driver support. Therefore, unlike with Windows 8.1, you won’t be able to connect to the Internet without first making a couple of changes in VirtualBox. So in this article I’ll share with you what I did to enable internet access to Window XP virtual machine under VirtualBox, hoping that someone may find it useful. And even though I used Ubuntu 15.10 as the host, these instructions should work despite what operating system you’ll be utilizing to act as the host.
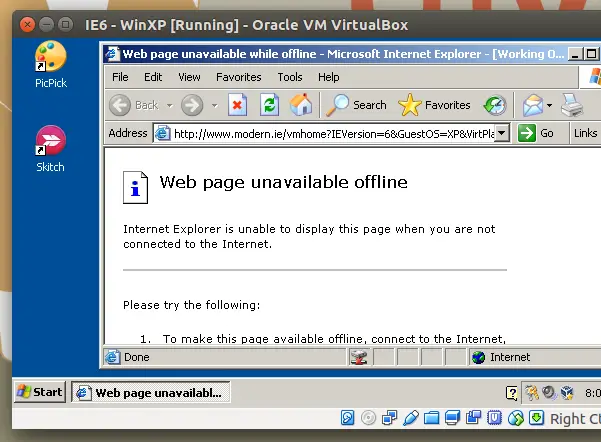
What we’ll be doing is simple. First we have to change the network setting of VirtualBox for the Window XP VM. And then we have to download the network adapter driver through the Host operating system, share it with the VM, and install it on the Windows XP VM. Afterwards, Windows XP will be able connect to the internet. It’s pretty simple. So let’s do it.
Step 1: First of all, if you’re already running the Window XP virtual machine, then turn it OFF. Then from the VirtualBox VM manager window, select the Windows XP VM and click on the Settings icon.
Step 2: Then click on the Network tab, and make sure you’ve selected ‘NAT‘ under Attached to: option. Then click on Advanced, and under ‘Adapter Type‘, make sure you’ve selected Intel Pro/1000 MT Desktop(...). Below that, the ‘Cable Connected‘ option should also be checked.

Step 3: If you’ve already setup a shared folder for the Windows XP VM you can simply click on the ‘OK’ button and move on to Step 4. Otherwise, don’t click on the ‘OK’ button just yet, and click on the Shared Folders icon instead.
From the window to your right, click on the small folder icon with the green cross to add a shared folder.

You can share any folder with the virtual machine. I’ve shared my ‘Home’ folder (which is the equivalent of ‘My Documents’ in Windows) with the VM and since I should be able to write to the shared folder from the VM, I make sure to uncheck ‘Read-only‘ option and check the ‘Auto-mount‘ option so that the folder gets mounted every time the virtual machine boots up. You can also changed the name of the mounted folder as well (by default VirtualBox uses the shared folder’s name).
Step 4: Now download the Intel Pro/1000 MT Ethernet adapter driver from this page (there are two drivers. One for the 32-bit version of Windows XP, & the other is for the 64-bit version) using the Host operating system. Once the download finishes, copy it over to the shared folder.
Step 5: Now turn ON the Windows XP virtual machine. Once it finishes booting, open My Computer and you should see the shared folder mounted there. Now locate the downloaded Intel Ethernet adapter installer and install it (when unsure, 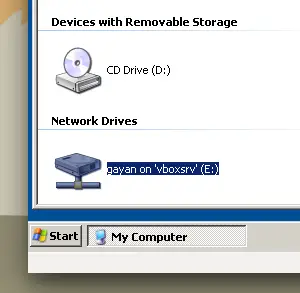 just go with the default selection of the installer).
Now open up the web browser and you should be able to access internet. If not, reboot the virtual machine. That’s it. Good luck.
Update (2019-04-11): It’s been a while since I wrote this tutorial but these steps should still work. However, even after following all these steps you still can’t connect to the internet, then try downloading Firefox for Windows XP from the host computer and then place it in the shared folder and install it from there. After that you should be able to connect to the internet as long as you are using that web browser. A especial thank you should go to Tim in the comment section for pointing this out!
P.S: (if you’ll be browsing internet often through the Windows XP VM, then replace the old IE with Firefox or Google Chrome).

102 Comments
Thank you! This worked like a charm.
How do you copy it over to the shared folder.